for a variety of reasons i am a big fan of sweaters knit in pieces, with seams to give them structure and durability. among their many attractions, the individual pieces make it easy to put a fine finish on the garment details by pinning and steaming, as a precursor to seaming and a final wet blocking. i demonstrate these techniques whenever i teach a blocking class, because many knitters have never seen them applied. sometimes students ask me, “but then, how would you block a sweater knit in the round?”
and most times, i will recommend to then go straight to wet blocking because it can be awkward or even impossible to steam block the details on garments knit in one piece. often you can get nearly the same results with frequent reshaping and fussing over details as the piece dries.
but once in awhile, there comes along a garment that defies the simple path of soaking and laying flat to dry. it might include some quirky shape or feature that requires extra special attention for that important first blocking. or large, relaxed cables that don’t hold their shape without rigorous “encouragement”.
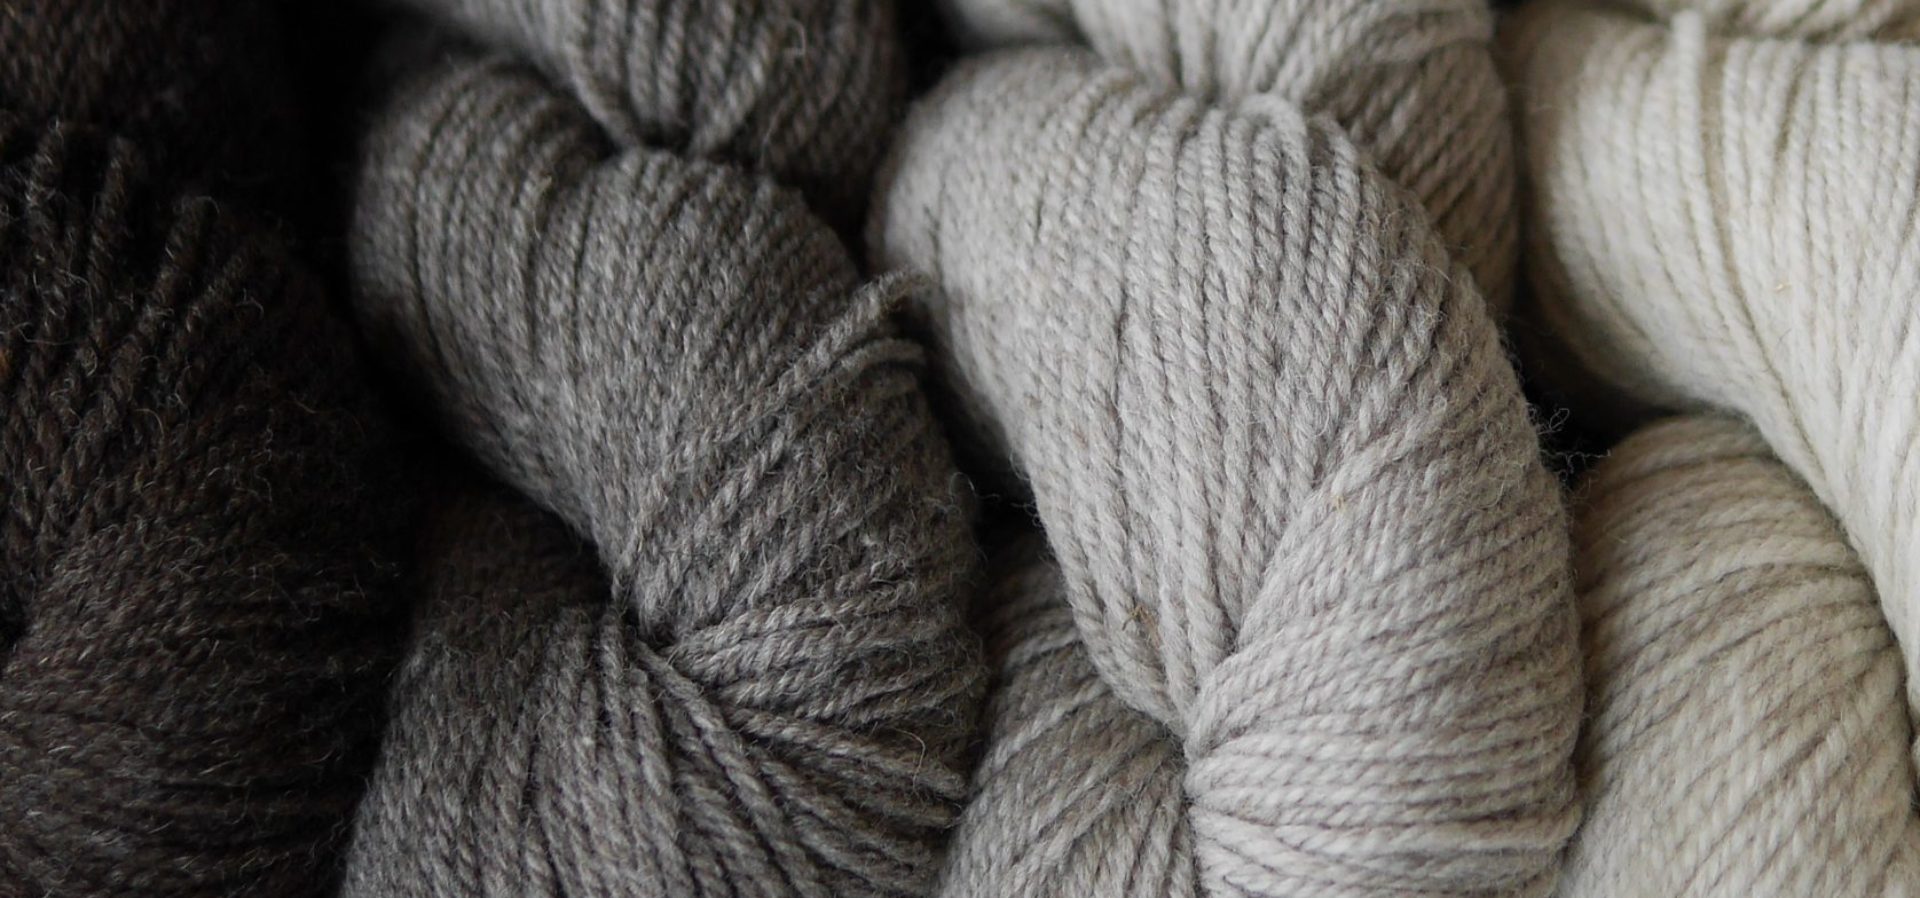
i recently completed a design that fell squarely into this category. the body is knit in the round from the hem up with oversized cables along the side seam area. at the underarms, it is divided to knit separately through the front and back yokes. in addition, it has a deeply textured cabled inset all around the neck which extends to form a curved back yoke. and when knit in our deepest charcoal gray shade—better breakfast fingering yarn in poppy seed—well, this is a sweater i will wear ALL the time.
preparation for this design required many large swatches to get that neck shaping just right. the change in gauge from the stockinette fabric to the cabled fabric is drastic; coupled with simultaneous neck shaping, it becomes one big geometric nightmare puzzle.
the first swatch did not increase fast enough and offered a less-than-compelling center front feature. not to mention that pleat forming long the center front line—guaranteed to grow in size and ruin everything.

my second attempt was a great improvement aesthetically, but now pulled the fabric in the other direction and not in a good way. i thought i could solve the issues here on paper and then go straight into knitting, so i decided to forge ahead and experiment on my garment sample.
while i did fix the puckering problem, i ended up with another underwhelming neck detail—i had to rip back about four inches of the sweater in progress, grr. still, every time i looked at the beautiful swatches of this mega cable, my determination returned. finally i got the balance right and was able to finish the garment.
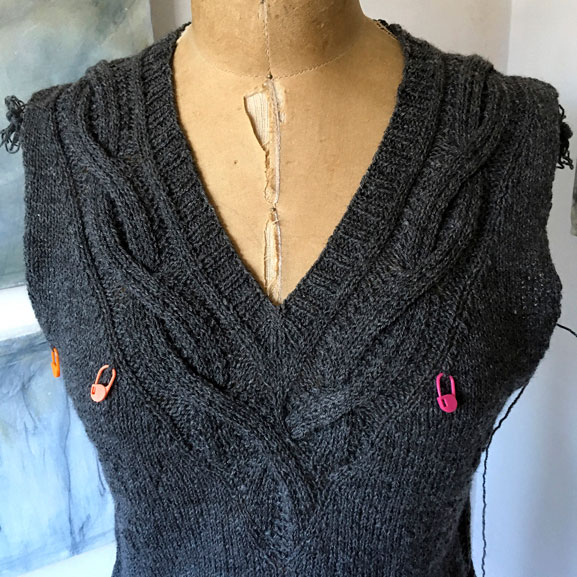
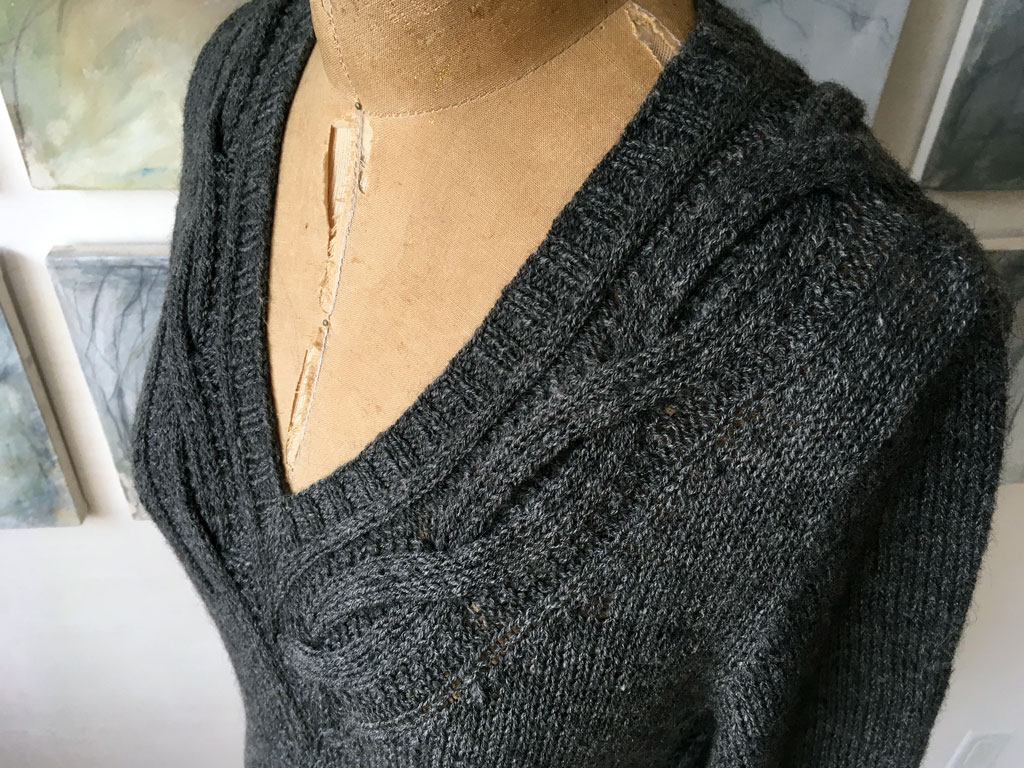
once off the needles tho, the sweater still looks scarily distorted and less than desirable. the cable cross involves so many stitches that it pulls the entire garment out of alignment until blocked. once tempered, however, it is a gorgeous frame for a deep v-neck that screams WANT!
the catch is, that cable really needs to be steamed to take some of the wind out of its sails. otherwise, it will constantly collapse into itself, drawing the yoke fabric and the neck edge with it. this situation not only causes unsightly puckering throughout the torso, it undermines the impact and drama of the oversized cable. underwhelming is not what we are going for here.
so . . . what to do? how do we handle the necessary blocking? since i definitely want everyone to want this sweater when the pattern comes out in our upcoming ensemble collection, i figured a tutorial would be a good way to make us all comfortable with the blocking steps needed. it’s not really difficult—it just requires a bit of patience, a ruler, and a good supply of pins, along with a hot iron and a wet towel. let’s get started!
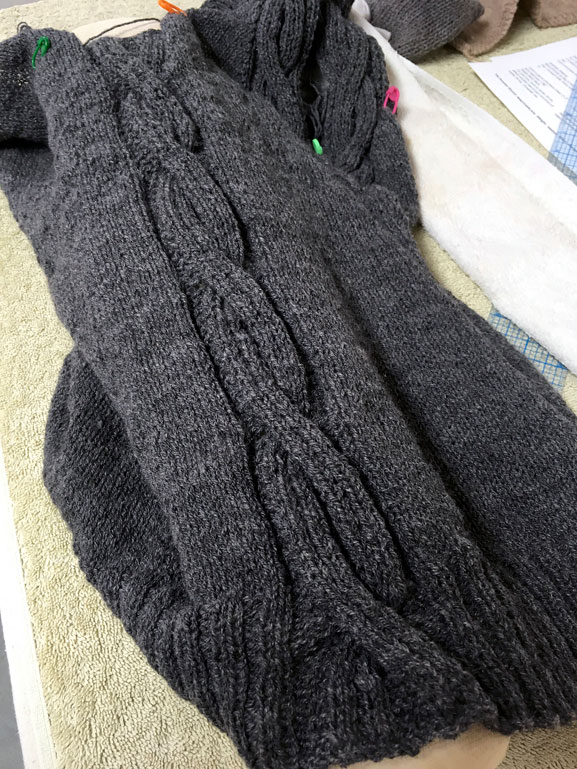
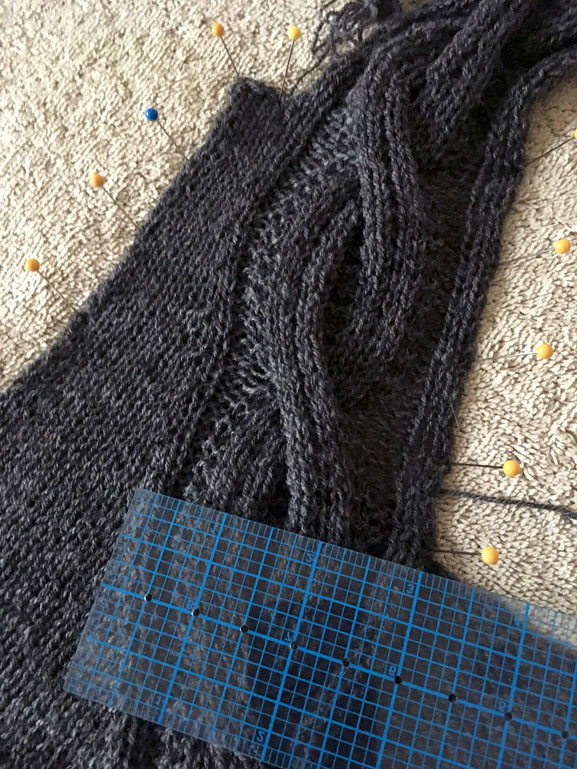
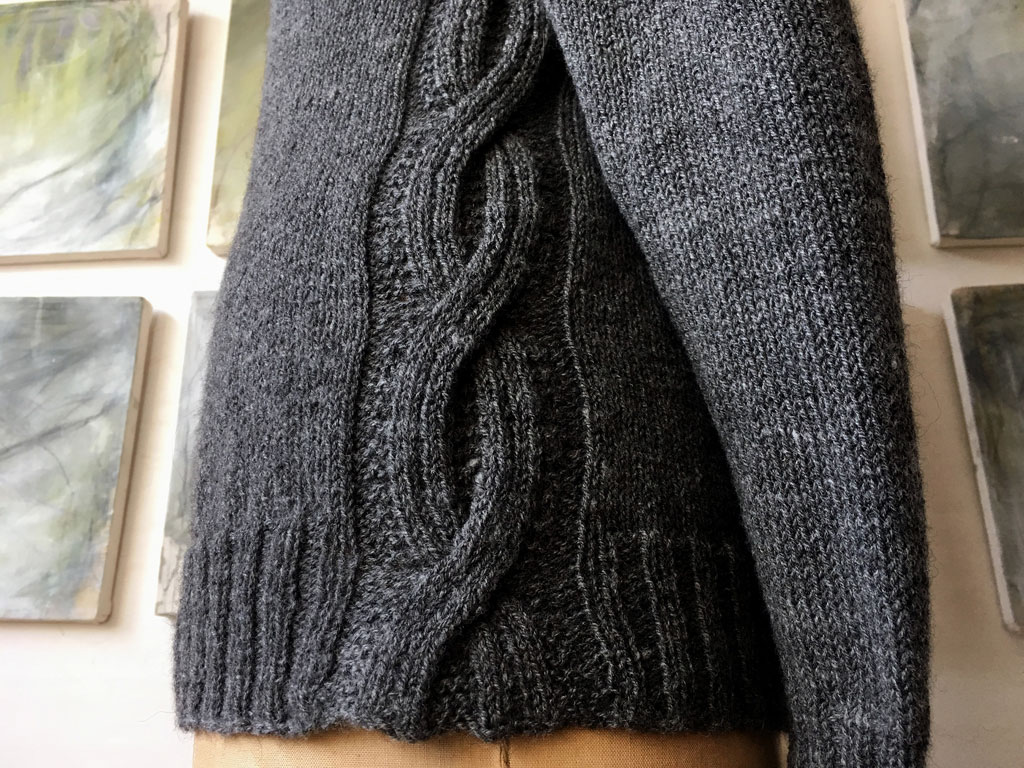
once the body was off the needles, i first steamed the cables along the side seams to open them up—until the cable to blocked to its proper expanded width, the gauge for the body won’t be correct and we will fight the tension in the cable while blocking other areas. since the body is knit in the round, i slip the side seam over my sleeve board to separate it from the garment. you could use a rolled towel or a padded ironing board as a substitute.
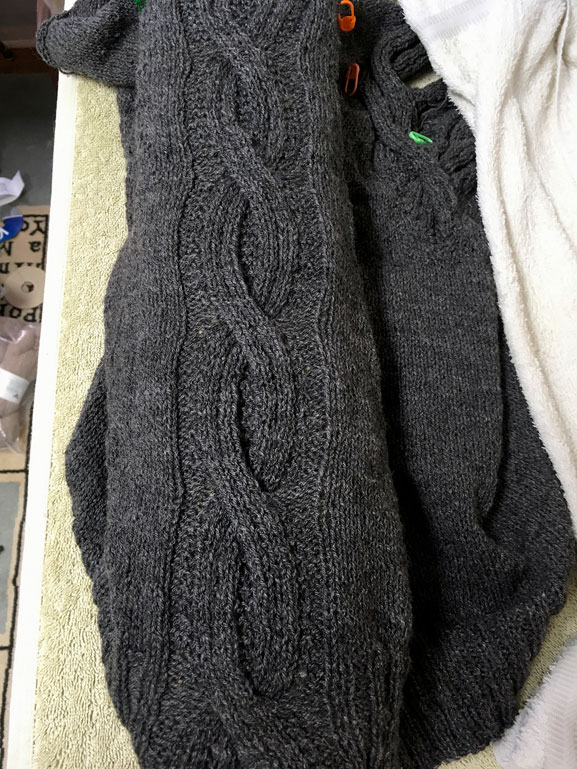
look at the difference; the blocked cable shows its wonderful inner texture and is much less bulky. don’t worry about losing the depth of the texture—it’s still plenty sculptural as you’ll see in a minute. i have to apologize for the lighting in some of these photos; i was working during an extremely dark (and short) december afternoon and sometimes had to put the overhead light on to see.
you can use a hand-held steamer for blocking as well if you prefer; these are generally cooler and do not require the use of a towel, but it’s a good idea to test your fabric to see how close to the surface you can hold the tool without causing damage. my hand held steamer feels awkward and needs constant refilling; i always gravitate back to my iron. maybe it’s just that i’ve been using it so long, but i find i can manipulate more easily.
once the side cable is tamed a bit, the garment can be laid flat with relaxed armholes. i placed the back yoke face down on my pressing area to begin, folding the front yoke down and out of the way. i have a large, permanently installed pressing bench with a pinnable surface that is covered with batting, muslin, and a terry towel. you can recreate this surface with blocking squares and a towel spread out on the kitchen table or countertop—any large flat surface that won’t be damaged by steam will do.
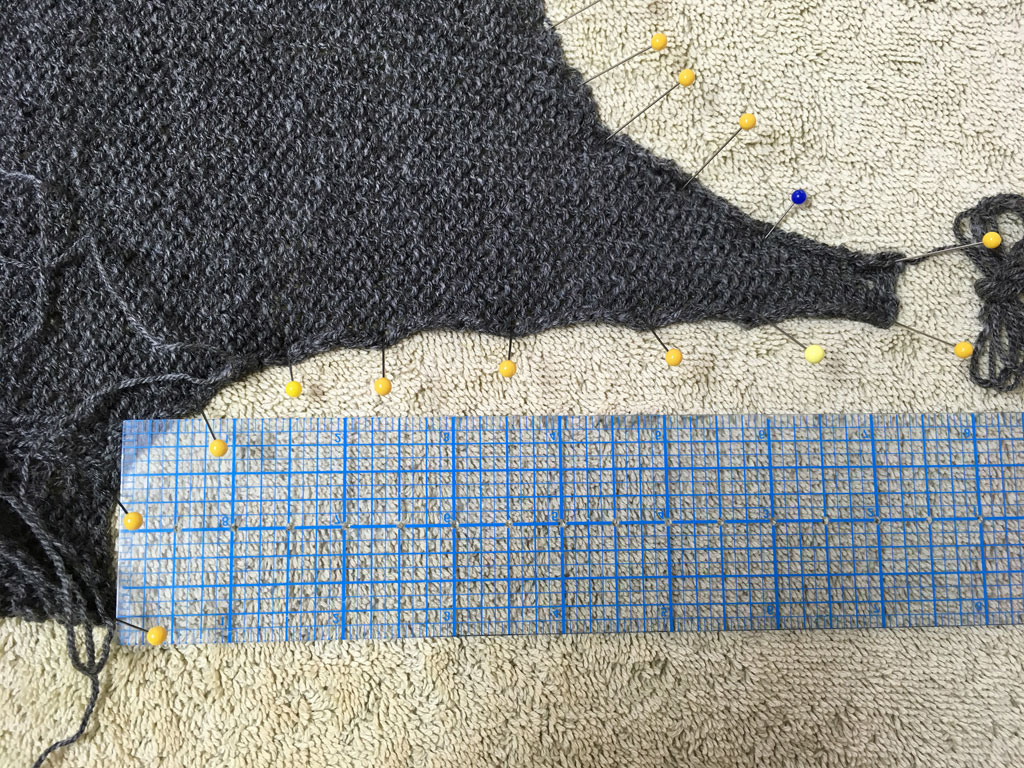
using my schematic, i pinned out the curve of the back yoke, taking care to maintain the correct, cross-back shoulder width all the way up the armhole. the skinny shoulder straps can easily take a wayward path, distorting the curve of the yoke. taking care to pin it all securely and squarely will pay off in a yoke that is easily seamed and hangs beautifully without bubbling later on.
after pinning the yoke edge and armholes to the correct width, i check to make sure the armhole is also the right depth on both sides and make any adjustments. i always step back to eyeball the whole thing as a last step; if it looks cockeyed at all, i make slight adjustments as needed.
now it’s time to steam this portion. my iron has been heating as i pinned and i’ve soaked a hand towel with cold water. i lay the towel over the pinned area and use the hot iron to LIGHTLY touch the towel, not putting any real pressure on it; all i’m aiming for is to create steam indirectly. when the iron meets the wet towel steam will be forced through the knitted fabric below and become trapped beneath the towel. there it will fill the fibers in the yarn, making them swell and bloom. in addition, steam helps to weaken the molecular bonds in the fiber so they lose enough of their memory to maintain the steamed shape. this is why you should never steam directly onto the fabric with the iron, or press a crease into wool fabric—once those bonds weaken or break, they cannot be reversed. it works in our favor for blocking, but it pays to be careful and respect the process.
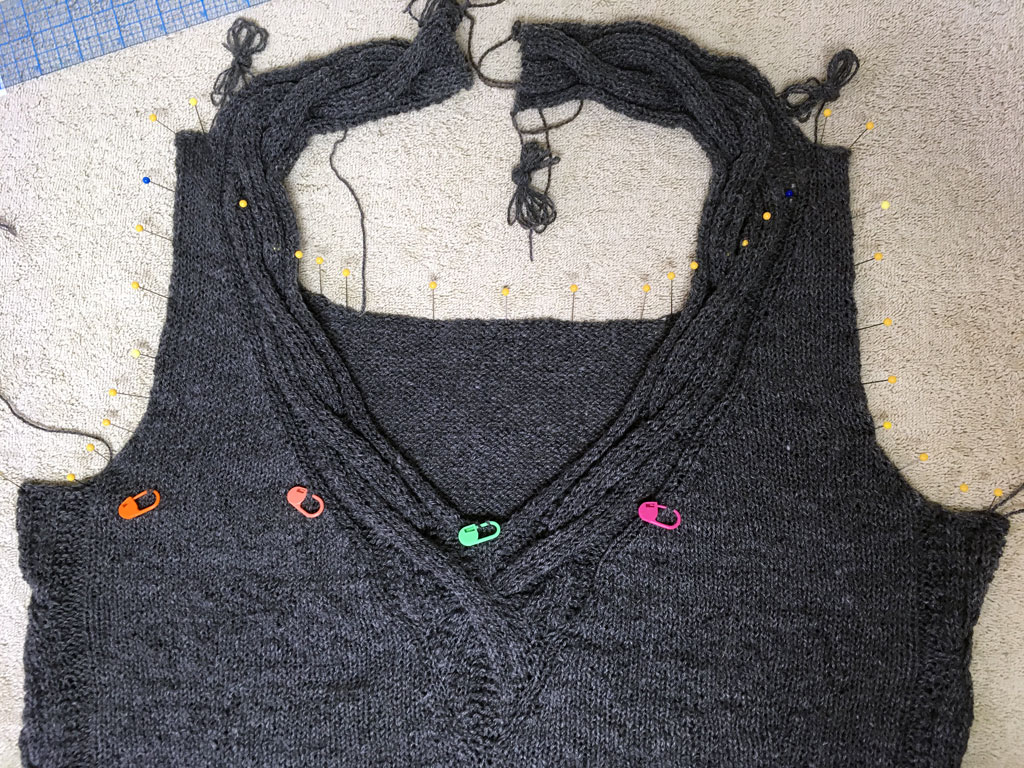
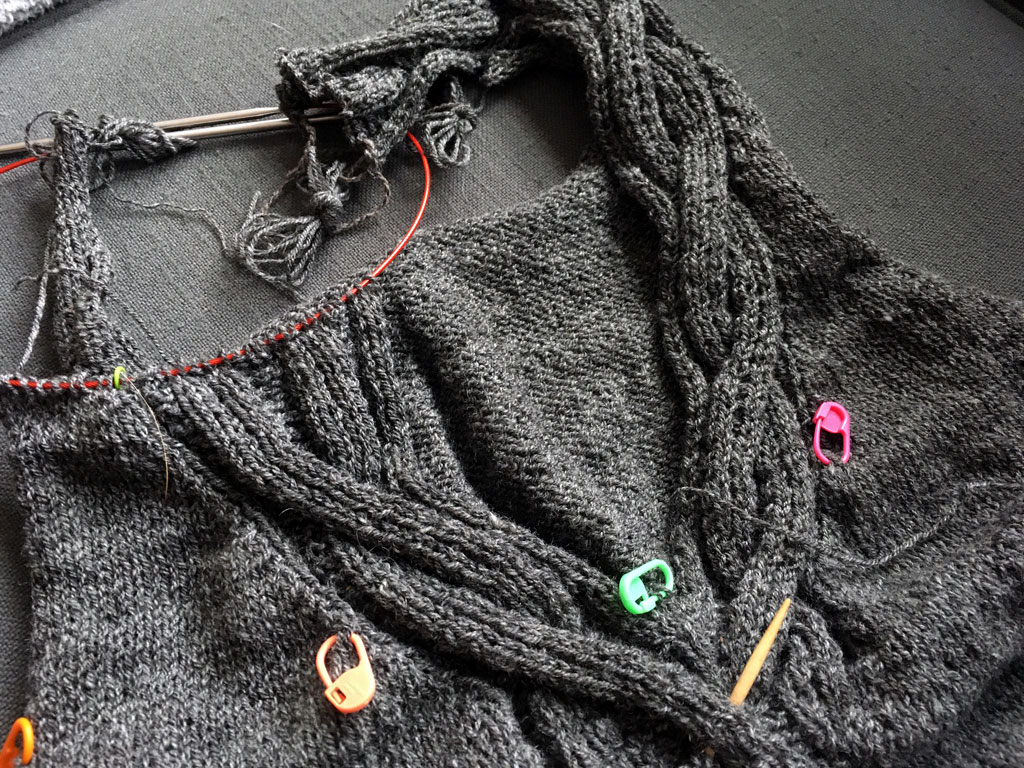
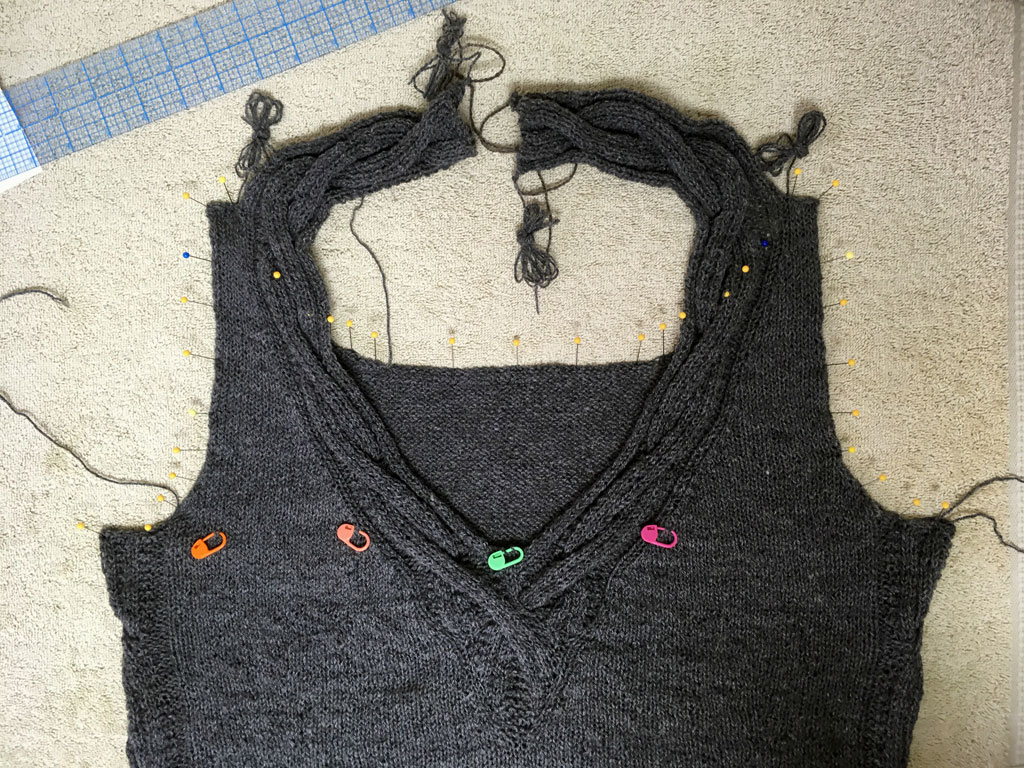
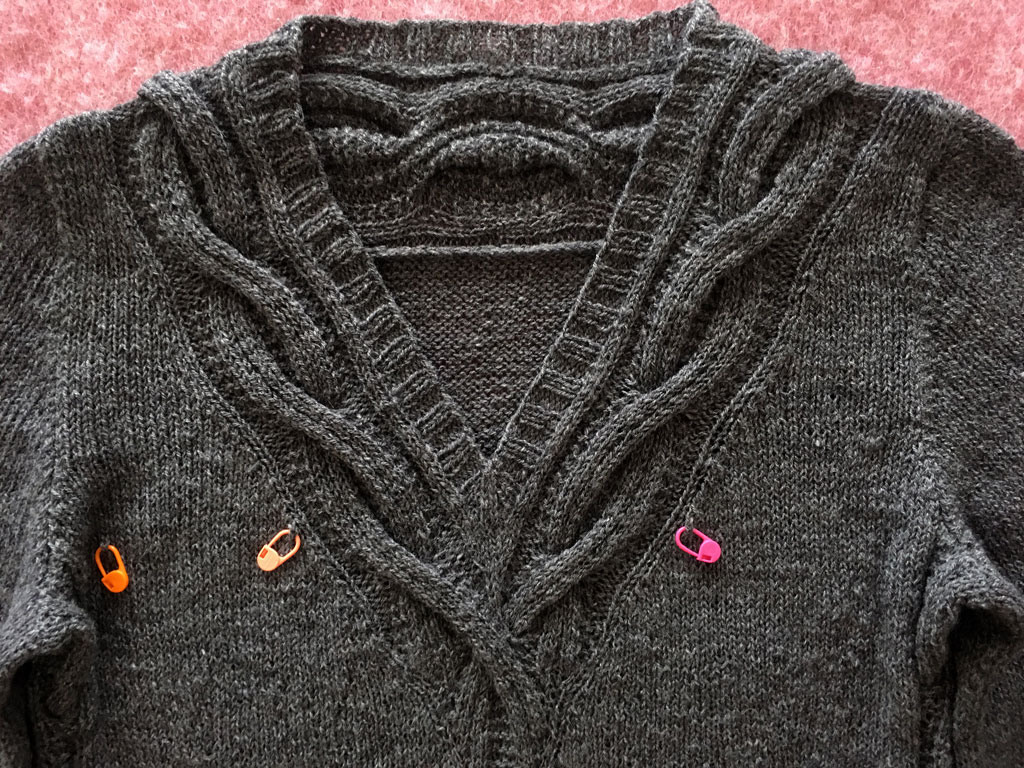
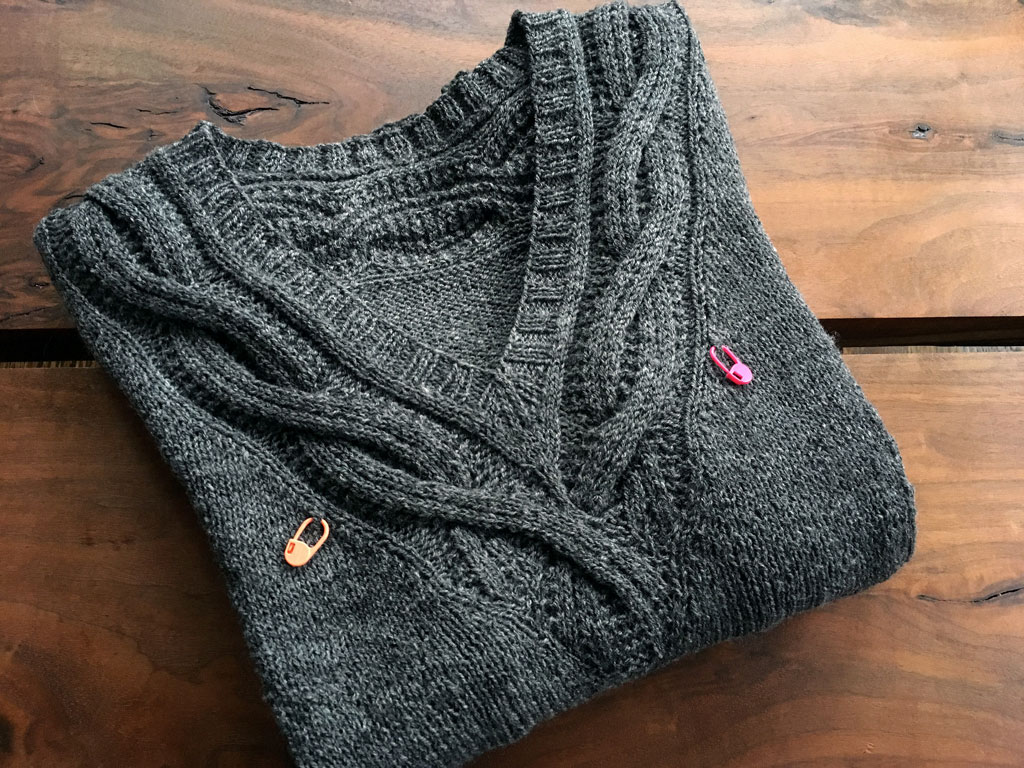
once the back yoke is blocked, i can flip the front yokes up over it and block right on top. this allows me to match the front armholes to shape of the back ones as a starting point. you might be wondering about those locking markers—they are placed at specific points that i want to remember for my written pattern; i left them in throughout the blocking process, but removed them once my notes were complete.
after pinning the armhole shapes, i begin pinning out that neckline. you can see by the number of pins i’m using—and the unevenness of the neck edge—that i’m pulling rather rigorously on the cable width to open it up.
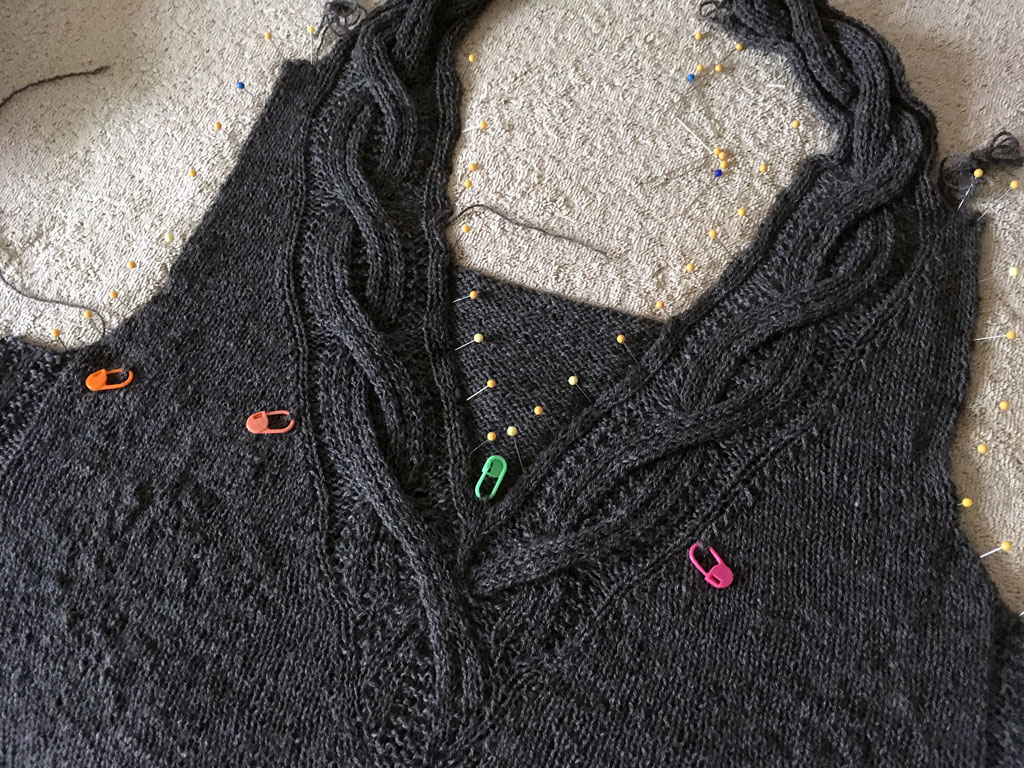
again with the ruler, haha! but in my case, at least, it’s a must; i have to be very precise so that when all the sizes are graded, we don’t end up with large distortions in sizes on the far ends of the spectrum.
once pinned, you really begin to see how beautiful this cable is. the very edge of the neck will look kind of awful at this point, but don’t worry too much—when that yarn relaxes from the steam, it will be easy to nudge it into a straight line and the pin marks will quickly disappear. adding the neck trim will also tighten and draw that edge into shape.
this is a good time to talk about the yarn actually—the design relies on a yarn that will relax easily into the shapes i want to achieve. it doesn’t have to flop about helplessly with no spring at all, but a tight twist merino might not be a good choice for this project. the engineering and fiber character will work against my effort to block the cable, especially around the neck where the free edge cannot apply tension and support. the mix of fibers in better breakfast fingering yarn is just right—the yarn has enough spring to hold its shape and give the cable some plumpness, but the silky alpaca fiber helps it relax. a soft twist allows the yarn to bloom, which adds support within the fabric structure.
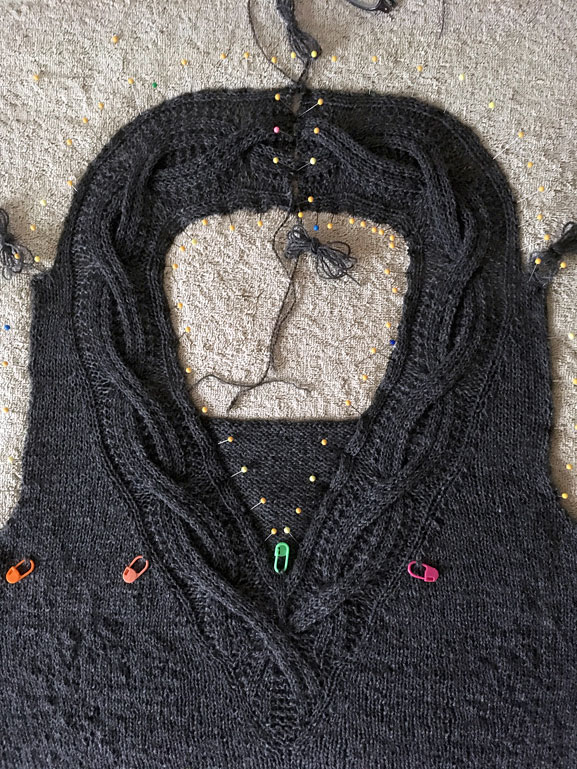
it’s not really a necessity to match up the center back yoke pieces so precisely at this point, but as the designer, i want to make sure that the width across the back neck (inside of the curve) is what i expected, as i’m seeing this for the first time. and holy cow, that’s a lotta pins! even though i’ve put so much work into pinning, i would take them all out if those yoke straps needed to be resized to make a correct neck measurement.

once i’m happy with the shape i re-wet the hand towel and cover my work. using the iron very carefully, i steam each section well.

after removing the towel, leave the pieces pinned in place to dry. see what i mean about the sculptural quality of the cable? there is no lack of depth here, but wow—the shapes are WAY sexier now!

after the yoke dries and can be unpinned, i give the lower body a quick steaming through both layers at once. this is mainly to open the fiber and get those stitches blooming, so that the main body fabric will match the other parts i’ve blocked.

i prefer my ribbed hem to be blocked flat, so i add a few pins at the side seams to help it along. once the steam enters the fabric, it relaxes quickly.

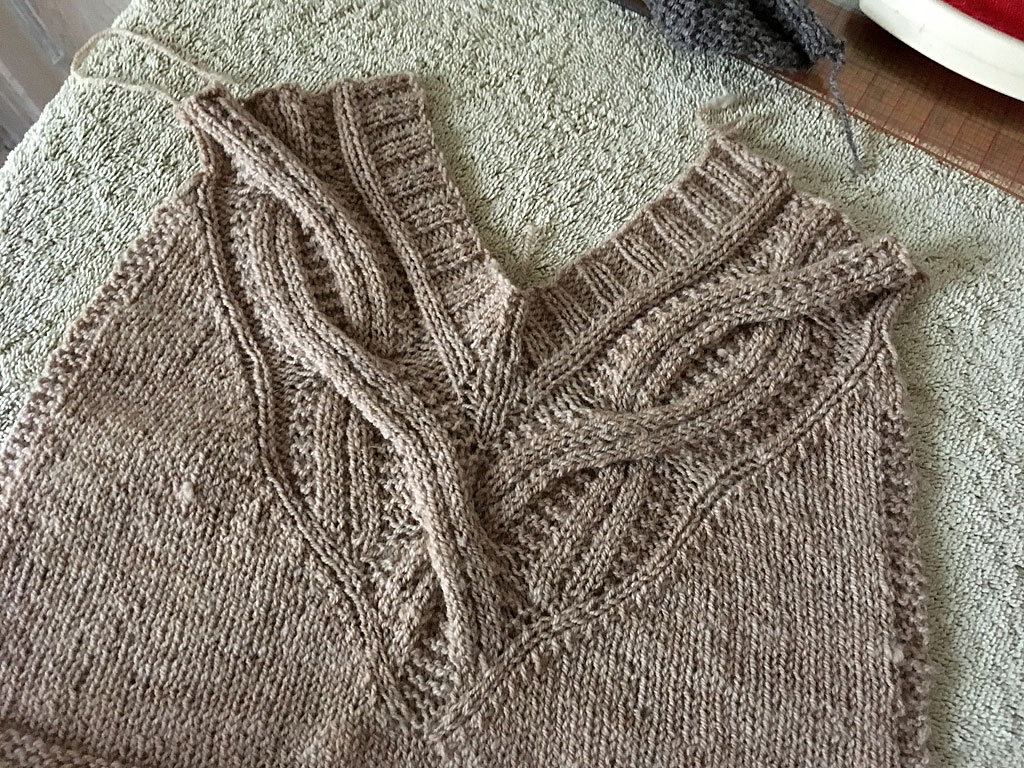
now you can see the gentle body shaping (optional) and the full impact of the details. i’m getting excited.
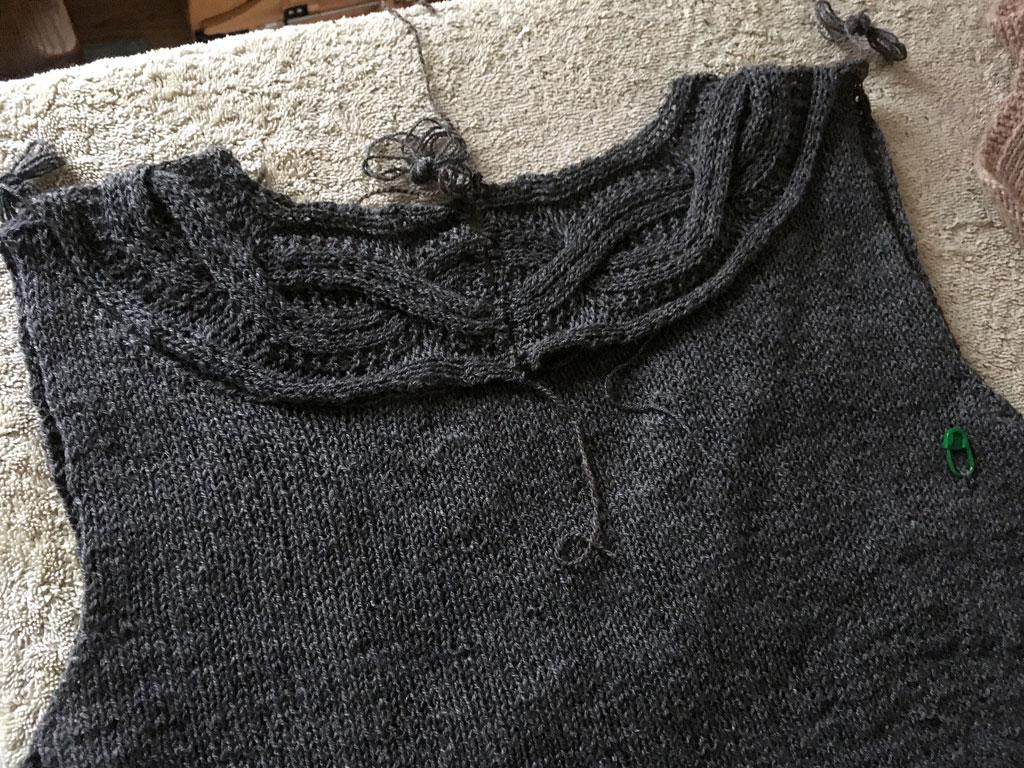
here’s a mockup of the back, with the front yoke flipped over the shoulders and cozied into that back yoke curve. looks like a good fit; i can now graft the yoke pieces and stitch the yoke down.
i left the yoke straps on scrap yarn holders, in case i needed to add or subtract a few rows when i fit them into the back yoke curve. my first sight of the fit is at this point in the blocking process—up til now, there’s been no way to know if my calculations were correct. it looks good—now to put it all together.

the next day i came back with the yoke grafted, stitched down, and the neck ribbing complete. everything went together like a charm, but it needed some serious steaming and blocking to look its best. the center back graft is tricky because it has ribbing and garter stitch, but you can achieve a nice join using my free grafting class on craftsy.
i folded a large terry bath towel and slipped this pad inside the garment up to the shoulders. this gave me a cushion between layers so that the back yoke pattern would not imprint through to the front side.
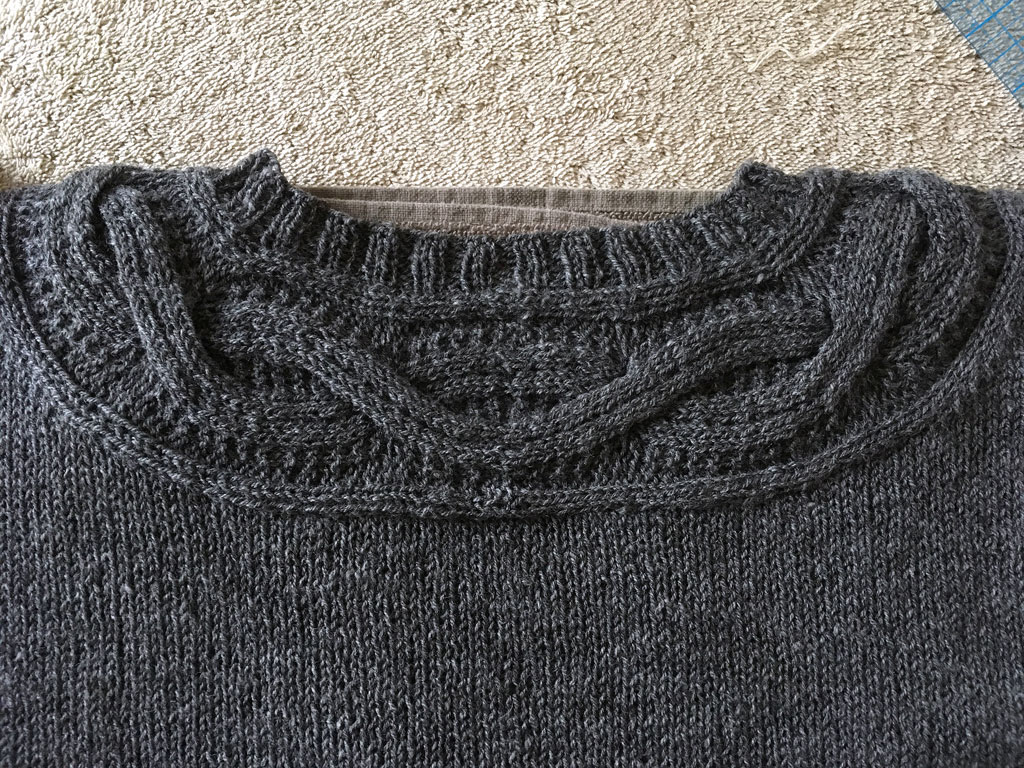
same steaming technique as for the other parts—wet towel plus hot iron to create steam; no pressure applied. while the fabric is still damp and full of steam, i nudge and prod to smooth out the joined area. once the garment is soaked well and washed, the blooming fiber will help to mask the slight jogs that are a common result of grafting. after a wash and a little handling, you won’t see them.
it’s easy to obsess over these quirky bits when working so close to the fabric, but try to step back periodically when assessing your work. no one, not even you, will be looking at these details under a microscope; friends be too busy admiring the overall effect and you’ll be too busy accepting compliments!
at the same time i also steamed the completed neckband front and back, stretching the ribbing very slightly so that it lies flat and the neckline doesn’t pucker anywhere.
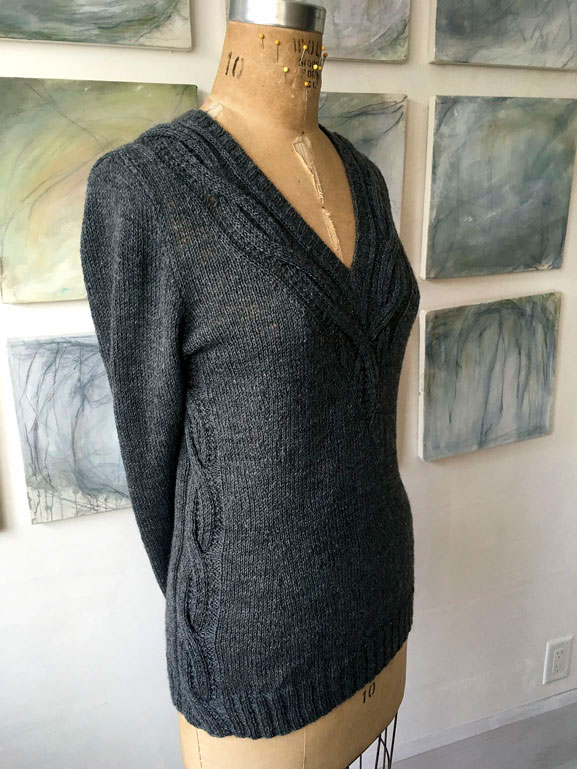
ok, time to see what we’ve created. one of the downfalls of working in the round in one big piece is that i can’t pin single pieces on my mannequin to check that they work. it’s just a big open tube until most of the finishing work is complete. but i can’t wait any longer—i have to take a peek . . .
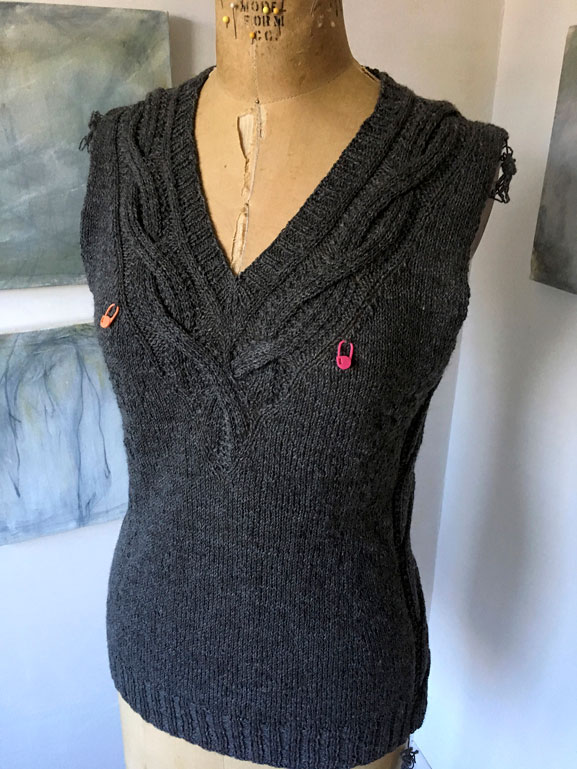
phew, it looks good and i like it! the slight torso shaping accentuates the lines of the neckline and bust, flaring up nicely to frame the shoulders and face. a gentle hourglass silhouette eliminates any bagginess at the waist that would counteract this effect.
my aim here was to create a neckline that appears to plunge deeply through the bustling area, but doesn’t have an oversized neck opening. the inset turned out just the right depth (thanks to all that swatching)—it skims over the top of the breast in a sexy curve but does not bisect it unattractively (thank heavens). it will likely elongate just a little more after a good bath and i think there’s plenty of leeway for that. i like it.
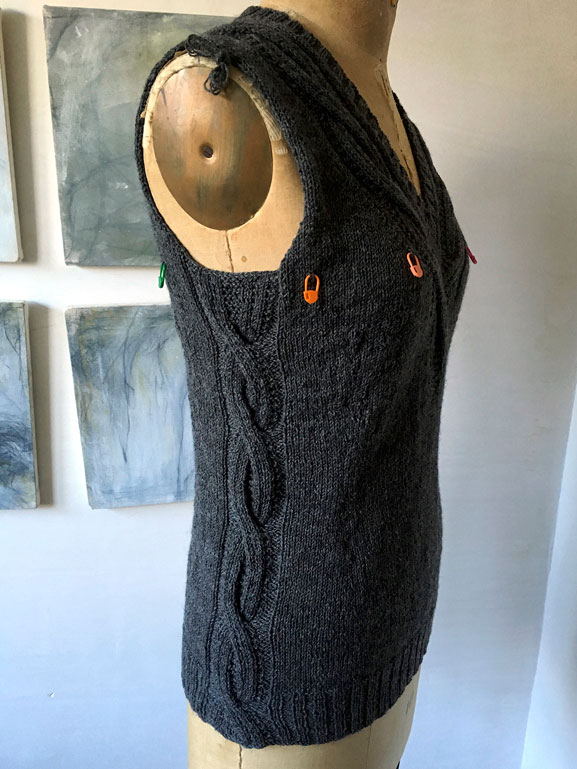
the blocked side seam panels are dramatically carved to carry the eye upward as well. steaming helped them spread out and flatten a bit so as not to add bulk; it also assists the fiber is blooming so the cables hold their shape.
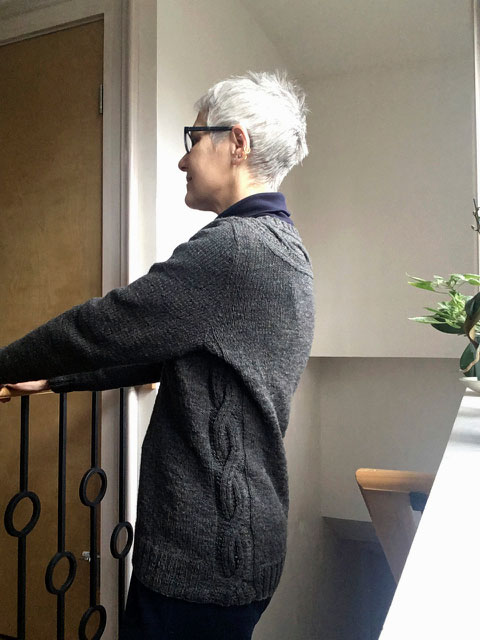
want to see it on? i can’t resist; i have to try it.
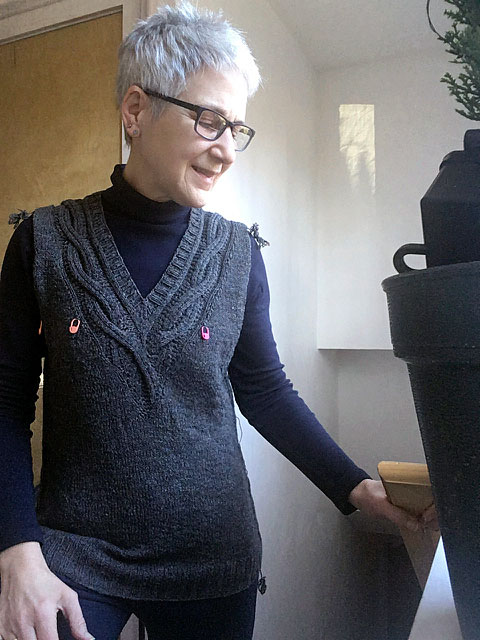
a bad selfie on a dark day, but it’s a thumbs up for fit and neck depth, yay!
ok, now on to the sleeve seaming. i pinned and blocked my sleeves as i did all the other parts, using my schematic as a guide, then steaming with the wet towel and hot iron. i stitch the sleeve caps into the armhole openings from the shoulder down (using those long yarn ends i left in the shoulders), ending each seam at the center of the underarm. afterward i steam the completed seams, using a tailor’s ham; click here to read an older post about the process and tools.
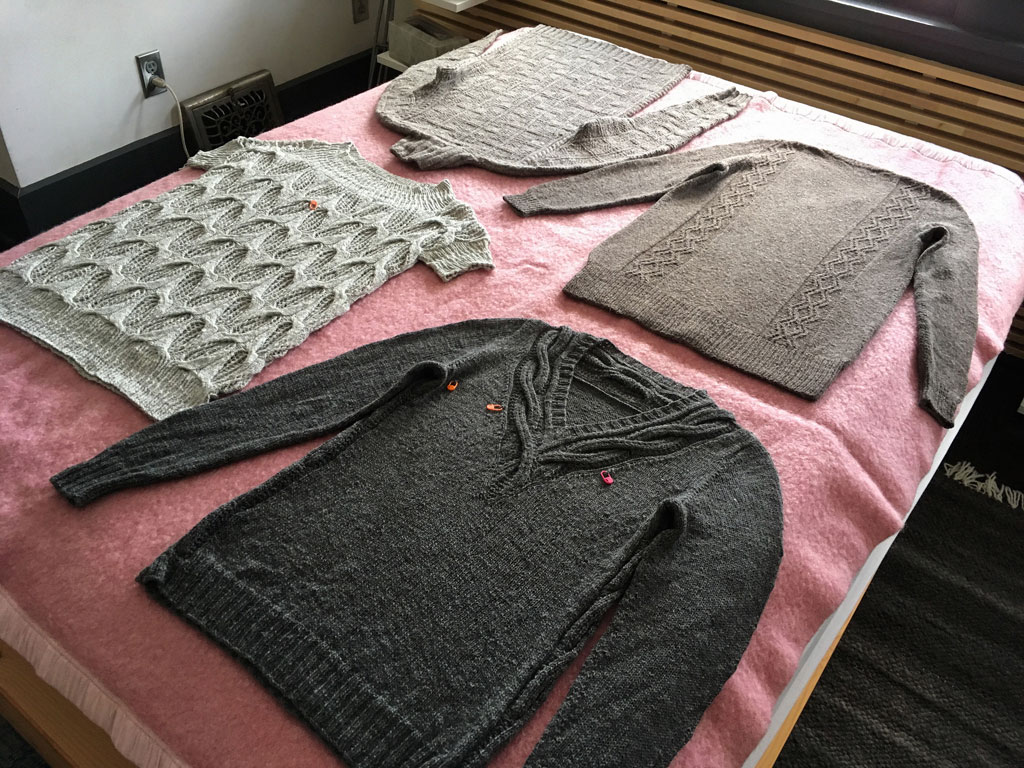
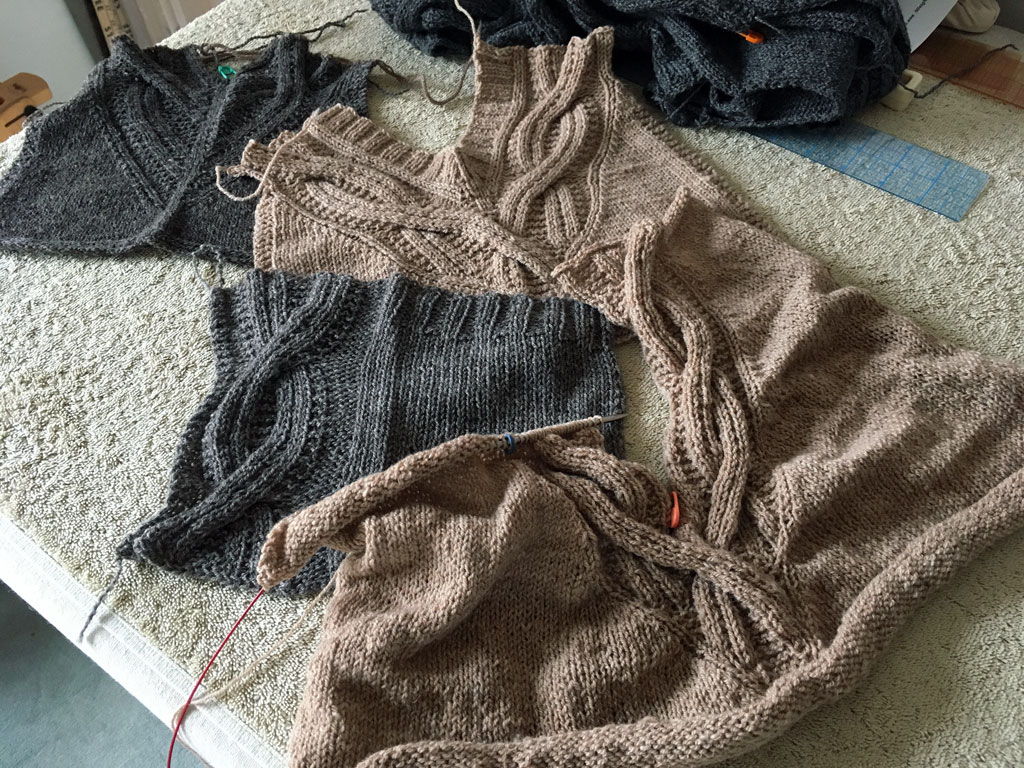
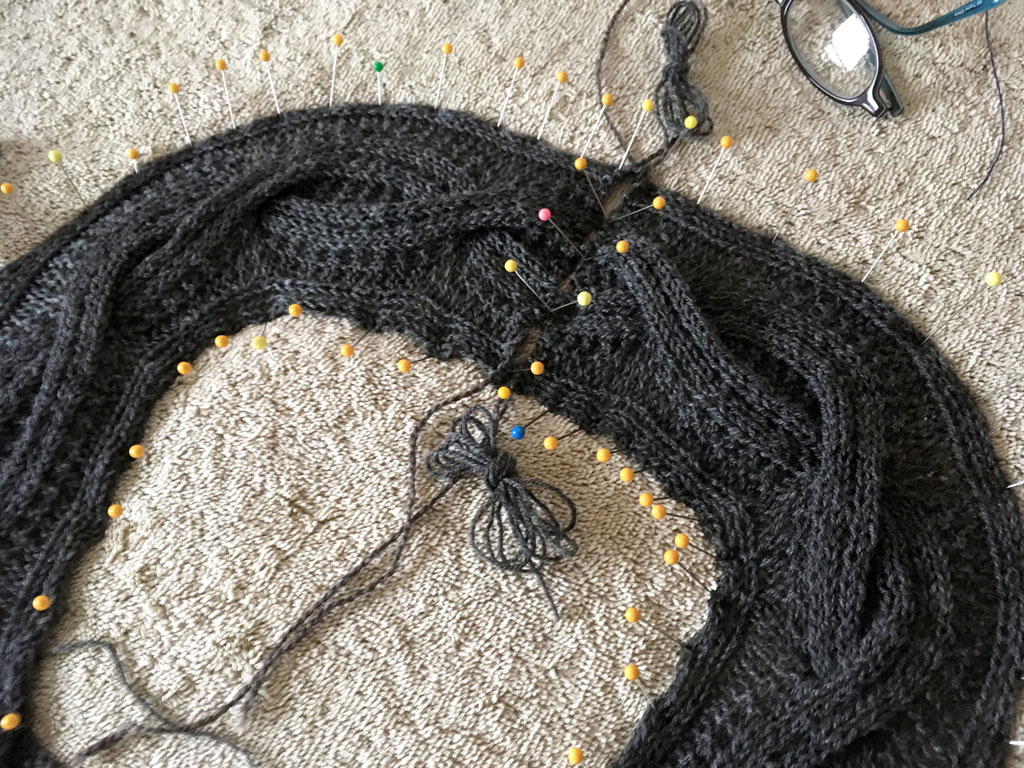
after the sleeves were seamed in, it was time for a bath. i like to wash machine my garments in mesh bags, using the hand wash cycle. mine is extremely gentle, but spins out a lot more water than i can squeeze out by hand. and since i hate to run the machine for just one garment, i grabbed all my BNWs sweaters and added them as well, including the aspergillum cable and lace top that i plan to publish later this spring (top photo, front left).
you can also see my subterraneans samples at the center of the photo below. in the rush of fall happenings, i didn’t get to blog about this pattern, which was published in the fall 2017 interweave knits.

while dyed yarns should be washed in cool water, natural yarns like ours can enjoy a full immersion soak in hot soapy water to remove any spinning oils or dust that remains on the yarn from the mill. this will encourage the fibers to lift and separate, causing the stitches and cables to plump and puff into their final shape. you should always wash your swatches to understand what the final fabric will be like, as it may vary considerably from its appearance and gauge during construction.
the steam blocking really helps the cable keep its shape. as it dried, i periodically stopped in to pull it widthwise a little, making sure it stayed open, but only to ensure it looked nice for photography. for everyday wear, i wouldn’t feel a need to fuss over it, as it really did look nice when it came out of the wash.

a couple more bad selfies, haha, just so you can see how washing will smooth everything out. you’ll get to see photos of it on a gorgeous model very soon.
because i have to dry it flat, the cables at the sides developed soft creases which again, i normally wouldn’t mind, trusting them to hang out after wearing for a little while. for photography’s sake however, i resteamed them lightly. doesn’t the fabric look SO much softer and cuddlier after a bath?
i knit the garment with a fairly long side seam length, but it’s easy to adjust if a shorter or cropped version is appealing.

it turned out to be quite graceful, i think. this is a piece you can dress up or down and wear with or without a shirt underneath. the fabric is light enough to serve nearly year round, but provides a cozy layer of warmth in winter, due to its soft halo of premium fiber.
the design can be knit in several of our fingering/heavy laceweight yarns, including, stone soup fingering (my favorite and next on my list!!), chebris lace (i might need a third), ghillie sock, deco fingering, and hempshaugh lace. the details pop no matter what shade you choose; it’s a great option for a dark yarn. i used around 1400 yards for my size.
i need to think up a name for it; i’m currently using the working title “deep dive”, but “plunge” is another name that i like. what do you think?
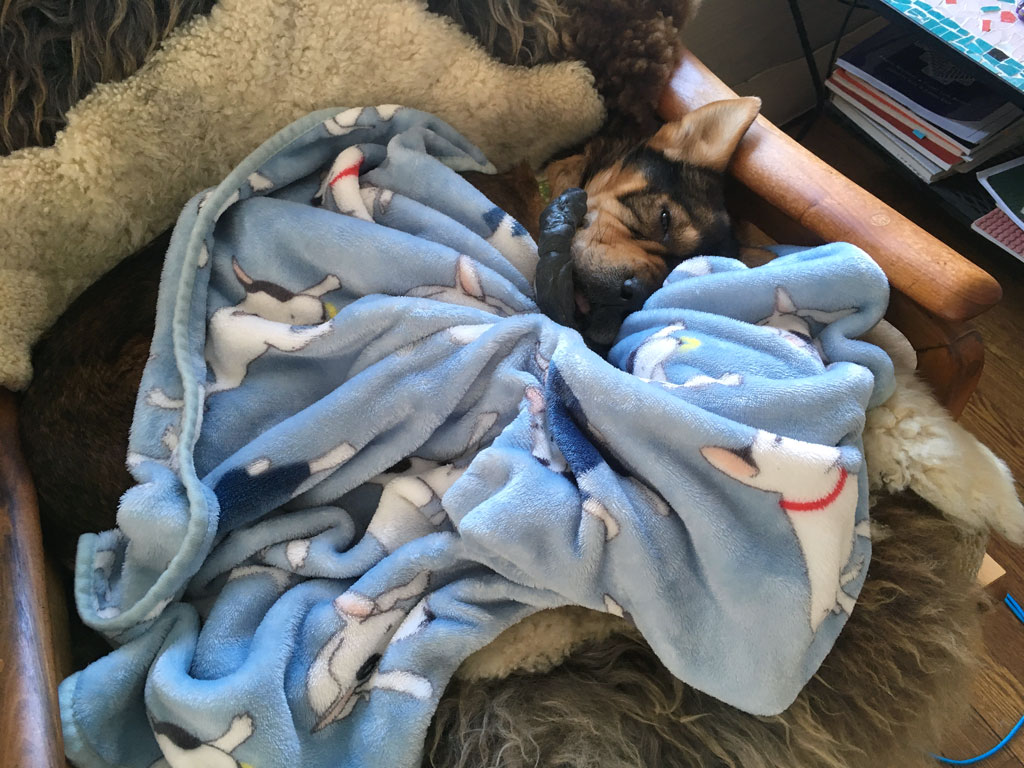
cardigan thinks “plunge” is perfect as long as it we are talking about her sheepskin and blanket nest.
i am itching to wear this all the time; i’ve been patiently waiting til all of our photography was completed, but then the weather got so cold for weeks and weeks, that i stayed cozy in heavier sweaters. spring is in the air today so who knows, maybe i’ll wear it to our company meeting this afternoon.
23 thoughts on “let’s un-complicate this”
Holy &%@* I can’t wait until this pattern is available!!! Absolutely gorgeous!
What a beautiful sweater! It’s always fascinating to read your explanations of design process. I must admit, the blocking aspect is still a little intimidating but this tutorial will be really helpful. I think that I do own your DVD – I should go check. Cardigan looks very very cozy!
Can’t wait for this release!
Wowza! I MUST have this sweater. The cables are wonderful!
Anne, thank you the great blocking tutorial/review. I love the way you show the process. Learning sweater finishing from you has made so much difference to my finished products!
Stunning. And the stitch markers are a nice touch! Just to possibly complicate your decision, what about Fjord or Fissure?
The sweater looks amazing, and I have been waiting for its release, but after that description I am now petrified. I am pretty convinced it is beyond all my capabilities.
I love all your sweater patterns, but this has to be my favorite pattern ever! Great post. Wonderful information.
Thanks, Anne, for such a detailed article on blocking. I loved it. One small note: the link to the free Craftsy class on grafting is working. “Page not found” message was displayed.
Your dressmaker details always wow me, Anne, this is just stunning. And a great refresher of your blocking class:)
I agree with all the above comments – it is spectacular!!!
I found the right URL for the free Craftsy class on grafting: https://course.craftsy.com/play/255?startLectureId=1662&t=0
I love this sweater. Thanks for the great blocking techniques. It’s always nice getting tips from you.
Beautiful sweater and amazing blocking instructions.
Healing thought to Cardigan!
Anne, This sweater is truly gorgeous. I may be jumping into the deep end with this one, but I’ll just have to resurrect the mantra I used while knitting Illas Cies: “Just take it one row at a time”! Brava!
I’m so excited about this new design, truly stunning! Thank you for the helpful blocking tips!
Now that is a beautiful and classy sweater!
So freakin gorgeous.
Oh yes, absolutely beautiful sweater. Ready for this challenge, cannot wait for the pattern to be released!
Phew! I scrolled and scrolled, worried that this would be a post without Cardigan!
So. Beautiful. ! And I really appreciate the tutorial on properly laying out and blocking a sweater like this. Can’t wait for the final pattern to come out!
Something weird is happening—it is January 31 and I just now got the notice of your January 22 post. (I’m very sure it’s a glitch in my computer.). Anyway, the sweater is beautiful, truly a work of art. Thanks for the Cardigan picture—he’s a lucky dog!
I just love this sweater!
I can’t wait until this sweater is released – it’s like you took all the things I prefer in sweaters out of my head and designed it just for me! Thank you for the detailed post on finishing – I already know I’ll be back here to refer to it often!
Comments are closed.