
the spring display in our neighborhood continues to be astounding through the week—now the trees are all busting out in bloom, bang, bang, bang.

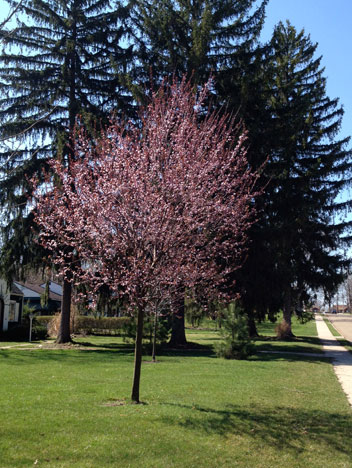
i look forward each spring to the blooming of this specimen cherry tree, which sits on a corner a few blocks up in our city’s historic ridgewood neighborhood.

on monday, its buds were barely evident, but with a week full of weather in the mid-80s, it was in full bloom by wednesday when i went out for my run. and yes, the sky really has been that color all week; hard to believe it’s going to rain all weekend as precicted—it’s just brilliant right now.
most years, there is a little more space between the blooming of different types and we can soak in their individual beauty one at a time. but this year, they are blooming in such quick succession that it’s a bit dizzying. each time i go out, i’m a bit overcome between the visual wealth or the glut of tree pollen in the air—i can’t tell which.
here’s another example, a smaller cherry tree that had tiny buds one day and the next it looked like this
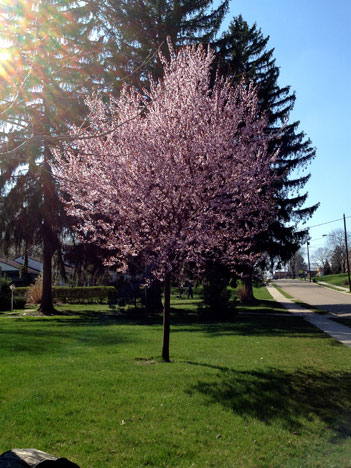
so many blooms that it actually looks bigger in size, haha.
on the knitting front, i’ve been working on a bunch of secret projects as usual, but as i mentioned in the last post, i also finished david’s sweater over the weekend. i’ve been putting off posting about it because i wanted to get some pictures of himself wearing it, but we’ve been running around so much this week that we haven’t had the opportunity to do that. each day nightfall comes before we know it and we haven’t managed the photos.
and now erica is about to arrive for a marathon work weekend, so i want to get this post up before she gets here. the modeling shots will have to wait, but i promise, we’ll do it in the next couple of days—we’ll get her to help us.
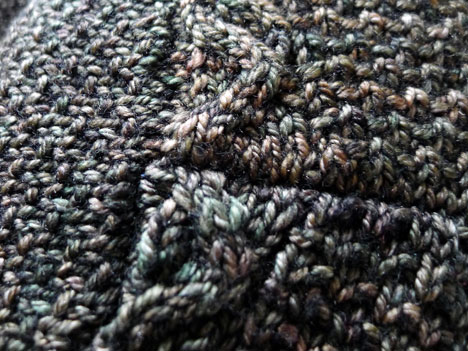
last time you saw the sweater, i had joined the shoulder seams and completed the neck finish—it was ready for complete seaming. this is a closeup of my shoulder seam, which i join with a three-needle bindoff, after shaping the shoulder using the short-row method. this is an optional technique you can use for shaped shoulders, for which there is a ton of online support and information.
i like this method because it produces a very smooth shoulder join with perfectly matched stitches. if i’m working with a textured fabric—and i nearly always am—this is the only way i’ve found to match it with exactness at the shoulders. the seam is also firm enough to support the sweater’s weight while maintaining a bit of elasticity. i don’t require knowledge of this finish in my patterns because it can be a bit tricky to work and i prefer to keep its use optional. but if you’re ready for something new, go for it.
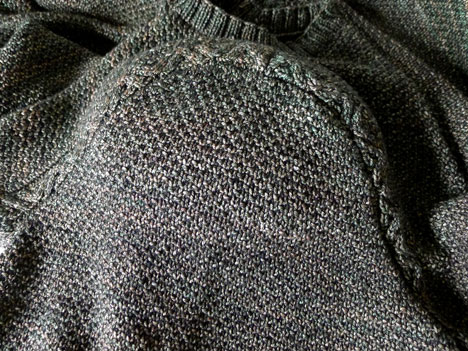
once i have the neck finish completed, i like to attached the curved sleeve cap to the sweater body at the armscye. now, this is the trickiest of all seams i think, requiring a lot of patience and often some ripping and redoing. i’m always glad when this step is behind me—once it’s done, the rest of the seams are clear sailing.
the reason the armscye seams are so tricky is that we are joining opposing curves to create a 3-dimensional shell to fit the curves of the shoulder girdle. not only are we joining opposite curves, but from one end of the seam to the other, the curve opposes first in one direction, then in the other.
and if they are not fitted together and sewn beautifully, it will positively ruin the finished look of your sweater.
i hate to be that blunt, but there you have it—ay, ay, ay.
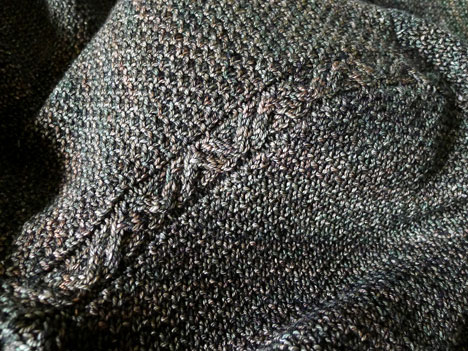
furthermore, if you don’t do a nice job pressing those seams once they’re joined, you can’t show off all your hard work to its best advantage.
so while i was pressing my own armscye seams the other day and sighing with relief that they were turning out well, i decided it might be nice to do a post all about getting a great final finish. you want to show off your good work, right?
i do like to stop and press the armscye seams before putting the remainder of the garment together. it’s tempting to rush ahead, sew up all the seams, and then press everything afterward, but these tricky curves will be MUCH easier to deal with while the garment is still open under the arms.
for this task, it really pays to have the right tools; pressing curved seams is challenging on a flat surface, particularly when dealing with handknits. once a crease is inadvertently steam-pressed into wool, it is very difficult to remove. it helps to have something rounded to work on . . . such as a tailor’s ham.
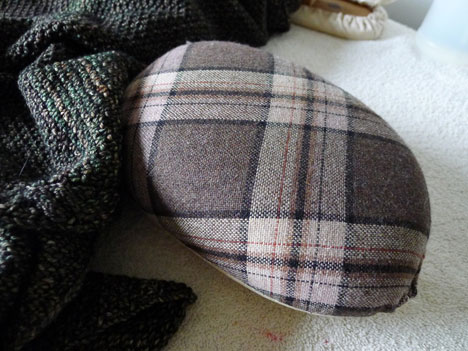
this is one of my favorite workroom tools—roll it around in your hands a bit and you’ll realize that no two corners, sides, or surface curves are exactly alike. it’s not-quite-elliptical, football-sized body offers every conceivable shape you’ll need to press any curved seam, dart, or collar.
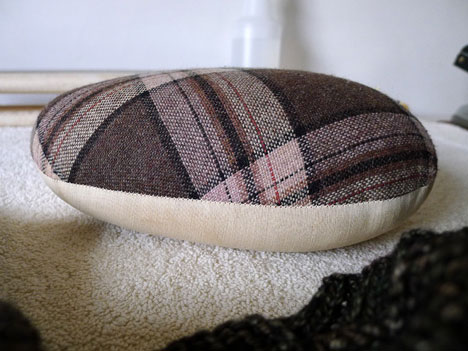
even in profile it is constantly varying from end to end.
santa brought my brown plaid tailor’s ham for christmas when i was about 12 years old—i was preparing to sew my first fully-tailored coat and i would need one. it was a real surprise, but i loved getting cool sewing and knitting tools at that age.
(why yes, i was a complete needlework geek as kid, why do you ask? oh right—i still am, haha.)
can you tell it was the 70s? traditionally, one side of the ham is always wool plaid; i know not why, but you cna sorta date them by the color and type of plaid that was used.
it’s funny, as i write this, i’m wondering just why i did need my own ham at that age; i know my mom had one and no normal household needs two of them. the operative word being ‘normal’, i guess. either that, or more likely, she found a bargain on it somewhere that she couldn’t resist and knew i’d need my own some day.
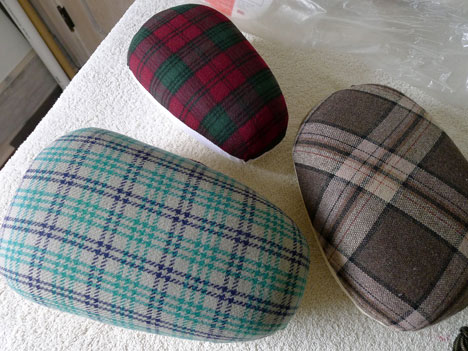
since i did work as a tailor for many years, i have my own small collection now. if you knit a lot of sweaters or if you also sew, you’d probably get lots of use out of a tailor’s ham if you don’t already own one. it’s a worthy investment; once you purchase one, you’ll never need another. they just don’t wear out.
something i learned while shopping for one to give to helena a couple of christmases back—i don’t think you can get the nice big, heavy ones new any more; at least, i wasn’t able to locate one. discovering this situation has put me on the lookout in vintage shops for a few tailor’s tools i never bought.
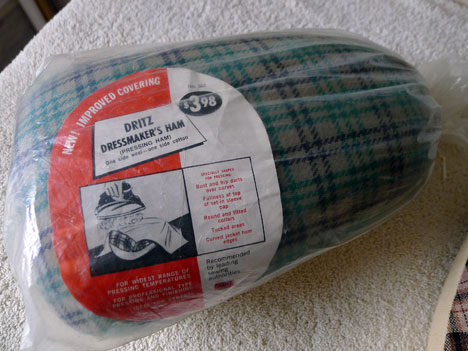
but vintage hams in nice shape are still pretty easy to locate on ebay and etsy—at reasonable prices, too (i kept the original wrapping for my largest one, which i found at a garage sale one summer, years ago). i even saw one etsy shop this morning that will make a custom ham or seam roll to your liking.
ok, i digress . . . you have to slap me when i stray like that!
we were talking about pressing armscye seams.
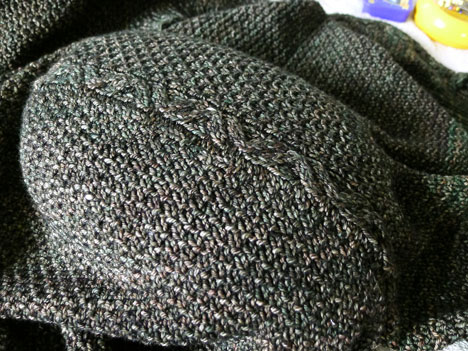
i lay my cured seam over the ham and move it around til i find the position in which it lies flat.
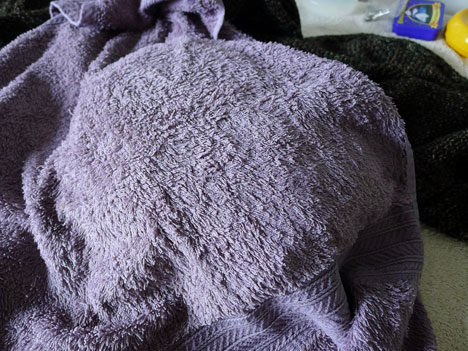
then i lay a wet towel over the fabric to cover it
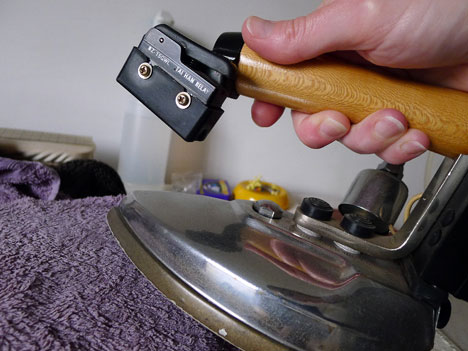
and with my hot iron, i press very lightly along the seam. never put any weight into it—you could easily end up with a shiny seam surface or crushed texture. you can always go back and press again, if needed.
once i do that i peek under the cloth to see how it’s going; if it doesns’t look pressed enough, i go over it once more. “enough” will vary from fabric to fabric; you sorta have to develop a nose for it, but basically, you are looking for a seam that is flattish and straight and yarn that still looks to have its original spring and liveliness.
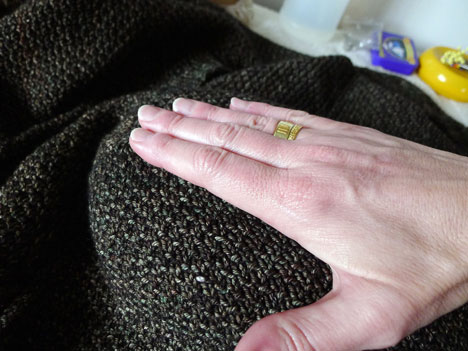
when i pull the towel off, i usually press my hand firmly onto the seam to hold some of the steam in just a little longer—sort of molding the fabric a bit at the same time. this is an old habit form my tailoring work, when i spent a lot of time shaping lapels and collars; wool is very moldable and many parts of a finely-made suit are more sculpted than sewn. you can also use a wooden clapper for this step if you have one; my hand is usually, well, handier.
when we do steam blocking in finishing class, this is the point where i pass the results around and everyone gasps over the difference before and after—i kid you not.
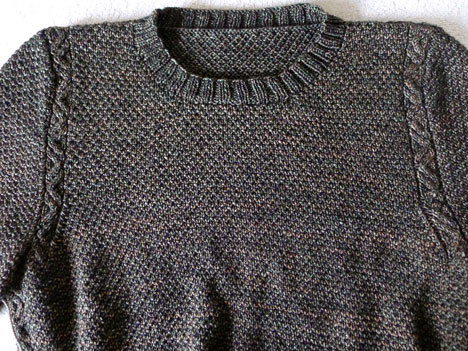
it’s harder to show on the blog but here goes—on the right is our steam-pressed seam; the cable is still nicely defined, but the shape is smoothed into a gentle curve and the surrounding fabric has been molded nicely around it. on the left is our unpressed seam, which is still lumpy form its stitching and stand sup from the fabric in a funny pinched way. trust me, it won’t look better on someone’s shoulder, especially when they move.
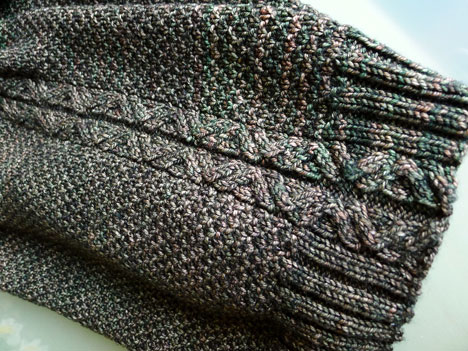
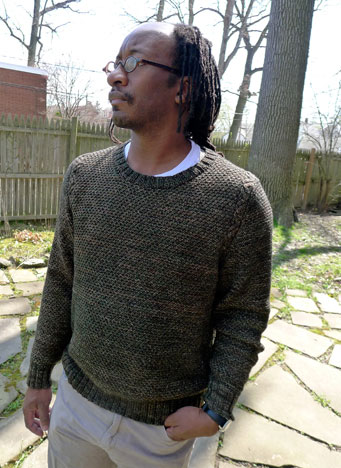
once the sleeves were in and pressed, it seemed a very quick matter to sew up the side and underarm seams while i visited with debby and susie last saturday. i went home, pressed those as well, and the whole thing was done. i love the way the side seams look with the double cables.
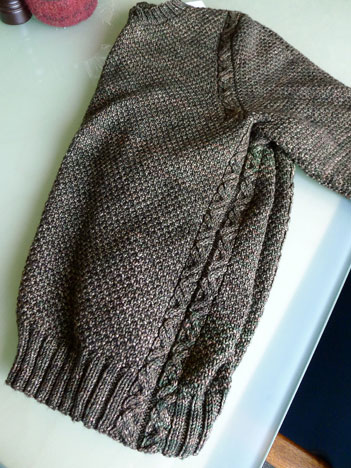
and now that i’ve dawdled over this post, getting sidetracked with stories and such, enough time has passed for david to be up and about and he graciously allowed himself to be subject to a few photos—anything for the blog, right?
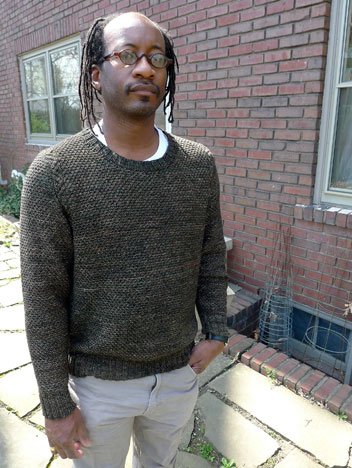
i even told him what you always say about his reluctance to smile and begged him to crack one for us
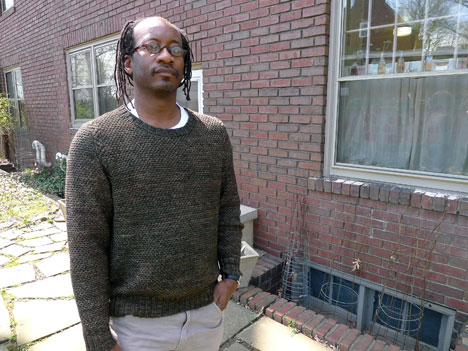
i’m serious. that’s it.
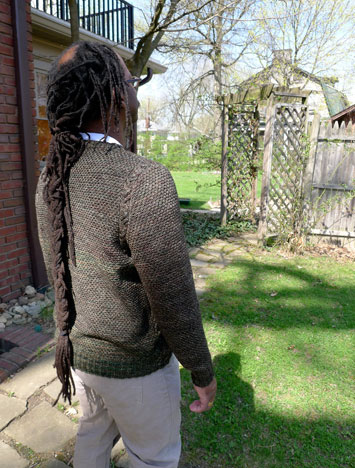
the back view is quite handsome, though i forgot to ask for a shot with his arm raised so we could see the side cables (next time, i promise).
and doesn’t the yarn just make it? my pal kim really knows what she’s doing at the dyepot; she created a color that neither of us can resist loving, so it was a pleasure to knit and i know it is destined to be a go-to sweater for david. if you like it too, take a look at her sporty kashmir in the enchanted forest colorway, or request a color of your choice.
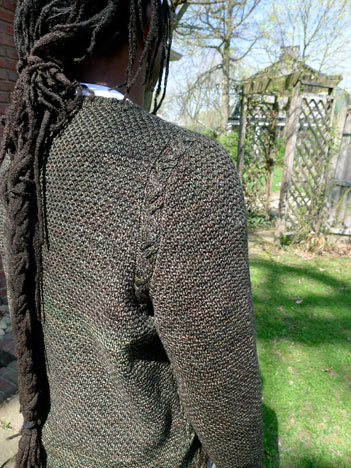
the back armhole seam is looking nice. i find that most sweaters don’t settle into their final shape and fit til they are washed and he wears them a time or two. for us, this usually means that they grow a bit, so i tend to err on the side of a little tightness in the finished piece. when the fabric relaxes, it looks just right.
david will often say that a sweater feels tight when it’s just been finished, but later will agree that it feel fine after all. and i’m happy when it’s not sloppy-loose.
what do you think??
one thing’s for sure—my husband is a great sport; thank you david!
the pattern is now in the hands of the test knitters, some of whom have already cast on. i think between all of us, we’ll have at least one of each version—vest, cardigan, pullover, v-neck, and crew neck. oh, and it’s sized for both sexes. i don’t know if we’ll get photos of all of them for the pattern release, but we will try.
now, what are we all doing in front of the computer on such a beautiful day??
GO—have some fun this weekend and we’ll see you on the other side.

41 thoughts on “pressing matters to discuss”
Wow, what a great finishing class! I did look at hams a while back on eBay but must renew my quest – how could I have lived without one so long!
David, you must stop all that silly smiling, lol! What a handsome dude!
I’m going to try the sporty kashmir in roasted chestnuts for this one – yum.
You really are having a spring explosion! It would be nice if this weather just kept on going, wouldn’t it?
wow david what was so funny? seriously you look so handsome in your new, freshly steamed sweater!
Love those vintage ham’s! The blocking tutorial is wonderful. I always learn something new on your blog. Ive been using a rolled up towel but now need to find a ham.
Seriously David, you smile way too much!
Excellent blog! The sweater and David look great, the trees are pretty, and how to use a ham and why are the first “user friendly” reasons I’ve ever read. I’ve got to go try and find mine and start using it again.
David is a real sport to pose for sweater photos in these temperatures!
Thank you for sharing the seam pressing information. I’ve finally starting blocking my sweaters, but I’ve never thought about actually pressing the seams. Something to remember in the future…
Thank you for the very very informative blog. I have not heard of “hams” and will be buying one shortly. I have always been frustrated with arm/shoulder joins and your information will certainly help. Also, I love the sweater pattern. I have been hoping you would do a unisex one with raglan sleeves. This is the style I prefer as I have large shoulders for a woman, with a smaller waist. Somehow, the raglan minimizes the width of my shoulders. My husband and two sons prefer the raglan style as well as they feel they are less constricted . The sweater looks very good on David, but he looks like he is being tortured as usual. Perhaps he should hold a sign saying, “Really, I love this sweater”.He is a very lucky guy to be on the receiving end of so many great knitted items.
The sweater is wonderful, and it looks great on David. I think this is a must-have color. And thank you for sharing your finishing techniques. I had never heard of a tailor’s ham, and honestly, would never have thought to take an iron to my knit fabric. I have not taken the finishing class at my LYS. I better add it to my list.
Love the sweater pattern! And the yarn is scrumptious!! It reminded me of chainmaille with the way the light hit it. Gorgeous! I really do like the cable treatment…especially around the sleeves. Gonna definitely add this to my queue!
Thank you so much for sharing the finishing information. Your method of steaming the wet towel, and molding it on the ham gives such a good result. The sweater is gorgeous, looks great on David. After spending all those hours knitting the sweater, it’s gratifying when it fits so well, and the seams look so amazing.
gorgeous! I think I have found the pattern I want to knit for a special gentleman. Can’t wait for the kits! (and I love the ham info, thank you, Anne!)
Beautiful design, Anne, and it looks great on David!
That is a beautiful sweater. I also love all the finishing information you share with us. I’d really like to take a class..
I had to go down to the basement & pull out my ham which hasn’t seen daylight in many years. It’s a small light blue plaid with a thin red stripe – wonder how old it is.
Ann – I love your blog. It isn’t just a few lines of ‘I made this and this is what it looks like.’. I now want a ham – I have not knit a sweater because I didn’t like the homemade put together way that some look. I know you are a professional but now I think I am going to try. By the way, I love the look of the buds on the trees – beautiful. Here,in Nova Scotia, it will be some time before we will be seeing any budding trees although the weather has been warmer than ever. Thank you, Ann, for all of the great information.
Great sweater. I’m putting this on the short list for my brothers.
The sweater is absolutely amazing!!! And David is just as handsome as ever…even without a big smile. 🙂
the modeling photos are great! i actually prefer a little bit more of a fitted look for menswear (i dunno, it seems a bit more updated/modern to me), so i love the way the sweater looks here right now 🙂
Wow! This sweater is a work of art. Just beautiful. Lucky David!
The whys of wool on a pressing ham? You use the woolen side to steam – well, woolens. Also any other animal fiber that needs to have the steam set in the fabric for a bit while they cool down. You use the cotton drill side for cottons (duh) but also linen and other plant fibers that don’t need the extra time to rest.
I have no idea what you would use if you were foolish enough to try to steam 100% polyester. I think I would just leave home at that point.
I love the texture of the sweater and the color is wonderful. Thanks for the tutorial, too. The finished product after the proper finishing does look great! And I loved David’s smile—what a difference in his appearance!
He is a wonderful sport! Thanks to you both. You do good work!!!
This sweater is…wow! And there is a woman’s version coming ? I thought I would knit one for my partner, but too bad…I’ll have to knit one for myself instead!!! :u) Especially since I have bought myself so much natural undyed yarn last week (I’ve heard comments saying that I should have bought the ewe instead, at least we would have milk)
Thanks for sharing with us these very useful techniques. Your blog is all at the same time informative, inspiring and funny. I have a very beginner question: do you have to redo the steaming after the sweater dries every time it is washed ? Or the regular blocking is enough in these occasions ?
Weather looks as wonderful in your part of the world than in mine (I went for a run in shorts mid-march in Montreal…!!!!). I’m sure it will go back to what is statistically normal for March soon, but it was good while it lasted. The cherry tree flower explosion you posted is uplifting. It is impossible not to smile when you see this fuzzy snow covered-looking tree in the middle of a perfectly green lawn.
What a great finishing lesson! I learn so much from your blog. Maybe one day I’ll be able to take a class from you! This is an excellent start tho!
Thank you so much, Anne. The sweater is absolutely beautiful – I love the double cables down the side seams.
And I certainly appreciate the finishing tips. Another designer casually mentioned once that he always irons his knits, but when I asked his method he never bothered to reply. Now I know what to do!
And I do need to get a ham. I bet they’re great for pressing fabric blouse shoulders, as well.
I learn so much from you, wish I lived close enough to take an in-person class!
David wears sweaters so well! It looks great on him.
It’s a beautiful knit! The yarn and pattern are a perfect marriage. Love the fit as well. Your talent continues to encourage me to go beyond my comfort zone!
All your information on seaming is so helpful, and confirms to me just how important the finishing is. Rush it and you’ll never be satisfied. Ask me how I know!!!
Thank you for the pics of the lovely flowering trees! We got 3 inches of new snow this week and are weeks away from flowering trees and tulips and daffs. You picks give me strength to get through the rest of our winter.
Also, the sweater is beautiful!
I love this blog post. It has knitting eye-candy and how. I learned something with the pressing explanation and tailor’s hams. And I laughed at David “smiling.”
Wonderful.
I love your pics of all the trees in bloom. We aren’t quite there yet. I had the hubs look at David’s sweater he actually agreed that he would wear one like that whooohooo!
That sweater is *perfect* for David! Just beautiful. He is a good sport and a great model, Anne.
Thank you for all of the hammy tips on making the finishing process even more professional. Love the iron, too.
Hope you have a great working weekend.
This post is a treasure trove of wonderful info, but one question: do you use mattress stitch to set in the sleeves? If so, do you go in a whole stitch or a half stitch when you sew? What exactly are you pressing open? Thanks so much.
Gorgeous (and handsome) sweater! thanks also for the finishing tips — always need reminders about those sorts of things. Definitely will be ordering some of those tailor’s hams!
David looks great in that sweater & I love the cable details around the arm.. Thank you for the tutorial on pressing the seams.
David looks wonderful in his new sweater!!! I found out how useful a ham would have been when I seamed my little Whitfield Shorty…..wonderful tutorial. 🙂
Thanks for the tips on the shoulders. I have very small small shoulders and I had a heck of a time putting in a fitted sleeve on one of my sweaters. I finally got frustrated and just sewed it in as if it were cloth. My local LYS lady says knitted fabric is “fabric”, but it is still hard to fit. I knit your Aztec Mazes sweater thinking a drop sleeve would be easier to fit me. I will say I loved the technique you used to shape the armholes and the ease I had to sew it together. I told a friend of mine I already knew you had a clothing background, but this proved to me that you know how bodies work. Thanks for your patterns and your tutorial. It helps.
Oh, I just love that “David smile.” He looks so handsome in his new sweater! Loved reading all the seaming tips. . . .
The sweater turned out absolutely spectacular! I love the location of all the cables!
Thank you for showing us how to press an armscye seam, Anne! The sweater’s a perfect colour and fit for David. Hope he’s very happy with it!
That is one gorgeous sweater! And even with the barest of smiles, David is pretty fab his ownself. I loved seeing the finishing tips. Such an elegant pattern this one is going to be!
the details make the garment a work of art. there I said it. as a life long sewist, I love to see the fine finishing work that you share.
and David. be still my heart.
david’s sweater is gorgeous! and thanks for the tip about the tailor’s ham– i’d never even heard of one of those, but now i think i’m going to hunt for one!
I’m sorry to be so late in my comment, but I saw a very positive review of Stitch Nerd’s custom hams on http://off-the-cuff-style.blogspot.com/ (look for her post from 1/11). I love my (generic) ham and use it for sewing, but I’ve always blocked sweaters flat. Now that I think about it, it doesn’t make sense to block flat when a sweater is ultimately worn by a 3-dimensional person! Thanks for beautifully illustrating the concept. I didn’t know you had a background in tailoring, but I’m not the least surprised to find out. You are so knowledgable!
Comments are closed.